Imagine slashing your energy bills while reducing your carbon footprint. For many Canadian homeowners, installing solar panels offers a path to both financial savings and environmental stewardship. But where do you start?
Did you know the average cost of a solar panel system in Canada is around CAD 22,500? With various government incentives and rebates, these upfront costs can be significantly reduced, making solar energy an attractive option. So, what should you consider before making the switch?
In this ultimate checklist, you’ll find everything you need to know—from evaluating your home’s solar potential to understanding financing options. Immerse and discover how you can harness the power of the sun for a brighter, more sustainable future.
Understanding Solar Energy
Curious about how solar panels can transform your home? Let’s jump into the essentials.
 5 tools every canadian needs for a successful solar panel diy
Benefits of Solar Panels
Solar panels offer a range of significant benefits, making them an attractive investment for Canadian homeowners. Firstly, installing solar panels can drastically reduce your monthly electricity bills, relieving the financial strain from rising utility costs. Ever wondered how these savings accumulate over time? Solar investments often pay for themselves within several years, thanks to lower utility costs and various incentives.
On top of financial benefits, solar panels contribute to environmental sustainability by reducing your carbon footprint. They generate clean energy, which means fewer greenhouse gas emissions. Interested in boosting your home’s value? Studies show homes equipped with solar systems often see a bump in market value. Modern solar setups can even include battery storage, providing reliable power and enhancing energy independence. Imagine the peace of mind knowing you’ve got a backup during a power outage.
How about maintenance? Minimal upkeep is needed. Once installed, solar panels operate with low maintenance costs, making them hassle-free. Ready to make a smart and sustainable choice for your household?
How Solar Panels Work
Understanding the mechanics of solar panels can sound complex, but it’s pretty straightforward. Solar panels contain photovoltaic (PV) cells that convert sunlight into electricity. When sunlight hits these cells, it excites electrons, generating direct current (DC) electricity. Curious how this powers your home? An inverter converts this DC electricity to alternating current (AC) electricity, which is what most home appliances use.
The solar energy generated can be used immediately or stored in battery systems for later use, providing flexibility and resilience. Excess power fed back to the grid through net metering often results in credits on your energy bill. Imagine having a system in place that ensures you receive money for the extra energy your panels produce!
Read also:5 tools every canadian needs for a successful solar panel diy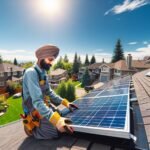 why some canadian diy solar installs outperform pros
Real-world example—on cloudy days, solar panels still work, though at reduced efficiency. Don’t let myths discourage you. Even in Canada’s diverse weather conditions, solar panels remain a viable and effective energy source. Looking to dive deeper into the technical side? Explore our comprehensive guides at Solar Panels for Life for more detailed insights.
Ready to embrace the solar lifestyle? With so many benefits, it’s clear why Canadian homeowners are turning to solar energy. Explore our products and services to find the perfect solar solution for your home.
Key Considerations Before Installing Solar Panels
Transitioning to a solar lifestyle involves several critical factors. Let’s jump into what you need to know before making this significant investment.
Assessing Your Energy Needs
Start by understanding your current energy consumption. Review past electricity bills to determine your average monthly usage. This data helps you size your solar panel system accurately. For example, if you consume 800 kWh per month, ensure your solar setup can cover this demand. Consider future changes too. Are you planning to buy an electric vehicle or expand your home? Factor these in to avoid undersizing your system.
Read also:5 tools every canadian needs for a successful solar panel diywhy some canadian diy solar installs outperform pros the worst times to install solar panels in canada (and when to do it)
Involve professionals. Reach out to a local solar consultant who can provide a tailored analysis of your energy needs. Remember, an optimized system ensures you fully reap the benefits of your solar investment.
Evaluating Your Home’s Solar Potential
Not every roof suits solar panels. Begin with a professional assessment of your home’s solar potential. Factors like roof orientation, angle, and shading significantly impact efficiency. South-facing roofs generally perform best in Canada. But don’t worry—east and west-facing roofs can work well too.
Check for obstructions. Tall trees, chimneys, and neighboring structures might cast shadows that limit sunlight exposure. Use online tools or apps that simulate solar potential based on your address. A quick consultation with Solar Panels for Life can also provide insights into improving your home’s solar efficiency.
Reviewing Local Regulations and Incentives
Understanding local regulations and incentives is key. Canadian government programs offer various incentives, making solar panels more affordable. Research federal and provincial tax credits, rebates, and grants available in your region. For example, the Canada Greener Homes Grant provides up to CAD 5,000 for eligible energy-efficient home upgrades, including solar panels.
Read also:5 tools every canadian needs for a successful solar panel diywhy some canadian diy solar installs outperform prosthe worst times to install solar panels in canada (and when to do it)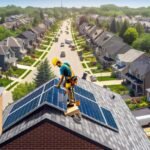 how to use canadian regulations for easy home solar panel installation
Compliance matters. Ensure your installation aligns with municipal building codes and HOA guidelines. Some areas may require specific permits. Failing to adhere could lead to fines or the need for costly modifications. Stay informed to leverage these benefits while staying compliant.
Budget Planning
Budgeting for solar involves more than just the initial cost of panels. Include additional expenses such as installation, maintenance, and potential upgrades. Speaking of figures, the average cost of a solar setup in Canada stands around CAD 22,500. But, smart budgeting and leveraging incentives can make this more manageable.
Explore financing options. Personal loans, leasing programs, and solar loans can ease upfront costs. Think long-term; although the initial investment may seem steep, the savings on electricity bills and potential increase in home value provide significant returns.
Are you ready to embrace the solar lifestyle? Explore our comprehensive guides and personalized consultations at Solar Panels for Life to start your journey towards energy independence.
Materials and Tools Needed
Installing solar panels in your Canadian home requires specific materials and tools to ensure a successful setup. Let’s jump into the essentials.
Essential Materials
To start your solar lifestyle journey, gather these critical materials:
- Solar Panels: The key component. Choose panels based on your energy needs and roof space. High-efficiency models make the most of available sunlight.
- Mounting Hardware: Secure your panels to the roof with durable brackets, rails, and screws. Opt for corrosion-resistant materials.
- Inverter: Converts the DC electricity generated by your panels to AC electricity. String inverters or microinverters are common options.
- Battery Storage (Optional): Stores excess energy for use during cloudy days or at night. A smart investment if you aim for energy independence.
- Wiring and Connectors: Help the flow of electricity between panels, inverter, and your home’s electrical system. Use weatherproof connectors for durability.
- Monitoring System: Track system performance in real-time. Many inverters come with built-in monitoring, while third-party options offer additional features.
- Net Metering Equipment: Ensures you can feed excess electricity back to the grid, often earning credits.
Have you ever wondered how these components work together? Picture this: solar panels on the roof capture sunlight, the inverter converts it for home use, and any surplus can be stored or sent back to the grid. This harmonious setup is the heart of your solar panels for life.
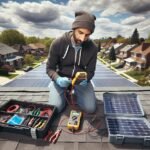
Required Tools
Ready to roll up your sleeves? Here’s what you’ll need:
- Drill: Essential for securing mounting hardware to your roof.
- Wrench Set: Handy for tightening bolts and screws. An adjustable wrench can be a versatile tool in this process.
- Multimeter: Checks electrical connections. Ensure your system is functioning correctly and safely.
- Safety Gear: Hard hat, gloves, and non-slip shoes. Safety first when working on rooftops and electrical systems!
- Pliers and Wire Cutters: Useful for handling wiring and connectors.
- Measuring Tape: Accurate measurements ensure precise placement of panels.
- Ladder: A stable, high-quality ladder is crucial for safe roof access.
So why these tools? Imagine you’re halfway through installing your solar panels and realize your wrench set is incomplete—frustrating, right? Preparation is key. By having the right tools, you streamline the installation, making your solar lifestyle transition smoother.
For every DIY enthusiast, this checklist ensures you’re well-equipped to embrace solar energy confidently. Want to explore more about solar panel options and installations? Head over to Solar Panels for Life and dive deeper into the world of sustainable energy.
Preliminary Steps
To ensure a successful solar panel installation, follow these preliminary steps before diving into the technical details.
Site Assessment
Evaluate your home’s site for solar panel installation. Start with the roof—inspect its orientation and tilt. Southern-facing roofs capture the most sunlight. Check for shading obstructions like trees or nearby buildings, as shadows can reduce efficiency. To visualize solar potential, consider using tools like Google’s Project Sunroof or consulting a solar energy professional for a detailed analysis.
Next, assess the structural integrity of your roof. An older or damaged roof might need repairs or replacement before installation. Ensure your roof can support the weight of solar panels and mounting hardware. Finally, measure the available roof space to determine how many solar panels fit. Conducting a thorough site assessment helps identify any preliminary upgrades needed, saving time and money in the long run.
Securing Permits and Approvals
Exploring permits and approvals is crucial. Solar panel installations require compliance with local building codes and regulations. Research your municipality’s specific requirements, which can include electrical permits, building permits, and utility interconnection agreements. Visit your local government’s website or contact their office for detailed application processes and fees.
In many regions, incentives or rebates are available that can offset installation costs. The Canada Greener Homes Grant, for example, provides financial support for residents making energy-efficient upgrades. Investigate these programs to leverage potential savings. Securing approvals from homeowner associations (HOAs) may also be necessary if your property falls under HOA jurisdiction. Prepare the needed documentation in advance to expedite the process and prevent delays.
Choosing to incorporate solar energy into your home not only benefits your wallet but also promotes a sustainable lifestyle. Taking these preliminary steps seriously sets the foundation for a smooth installation process. Ready to proceed? Check out our Solar Panels for Life product offerings and guides for more insights on embracing the solar lifestyle.
Installation Process
Ready to start your journey toward a greener future with Solar Panels for Life? Here’s what you need to know about the installation process, step by step.
Setting Up the Mounting System
The first step is setting up the mounting system. Mounts are critical for panel stability and durability, and they come in three types: flush mounts, roof-ground mounts, and pole mounts. Flush mounts are popular for their sleek appearance and effectiveness. Ensure your roof is strong enough to support the weight of the panels and mounting hardware. Measure and mark precise locations on your roof to ensure proper alignment. If unsure, consult a professional installer—accuracy here ensures efficiency down the line. Why take the risk?
Installing the Solar Panels
Next, install the solar panels. Place each panel onto the mounting structure and secure it with bolts or clamps. This task might seem straightforward, but careful handling is essential. Solar panels, though robust, are sensitive to improper handling. Here’s a tip: always wear gloves to avoid damaging the delicate surfaces. Double-check everything; tight yet not overly tightened clamps guarantee a firm hold without damaging the panels. Who said solar installation was complicated?
Wiring the Solar Panels
After securing the panels, it’s time to wire them. Connect the panels using junction connectors (MC4 typical) to ensure a tight and waterproof connection. Each panel has a positive and a negative terminal—connect them in series for higher voltage or in parallel for higher current. Understanding your energy needs helps in deciding the best configuration for your setup. Wiring should ideally be done by a certified electrician to avoid risks. Isn’t your safety worth investing in professional help?
Connecting to the Inverter
Once the panels are wired, connect them to the inverter. This component converts the direct current (DC) produced by the panels into usable alternating current (AC) for your home. Mount the inverter on a wall that’s easily accessible yet away from direct sunlight for optimal performance. Proper ventilation extends the inverter’s lifespan. Use gauge wiring compatible with the inverter specifications. Connecting the inverter correctly ensures that your solar panels perform efficiently.
Final Electrical Connections
Complete the installation with final electrical connections. This involves linking the inverter to your home’s electrical panel. Install safety devices such as circuit breakers and grounding equipment. These elements protect your system and home from electrical faults. Before flipping the switch, double-check all connections and inspect for any loose wires or unsecured components. Consulting a professional for this final step guarantees adherence to local electrical codes. Why not ensure the utmost safety and efficiency for your solar lifestyle?
Ready to make the switch? Installing solar panels in your Canadian home could be your first step toward a sustainable future. Explore the options at Solar Panels for Life to find the perfect system for your needs.
Post-Installation Steps
System Testing and Commissioning
You have successfully installed your solar panels. Now, let’s jump into system testing and commissioning. Essentially, testing ensures that the entire system functions as expected before it begins generating electricity for your home. First, conduct a visual inspection to check for any apparent issues with connections, mounts, or solar panels. Ensure everything looks secure and aligned.
Use a multimeter to check the voltage output of each panel. This step verifies if each panel produces the expected voltage, reflecting efficiency. If discrepancies arise, it could signify issues like shading or faulty wiring. Following this, test the inverter. An inverter converts the DC electricity from your panels into usable AC power for your home. Ensure it turns on and operates within the specified parameters.
Next, perform a load test. This involves connecting the solar power system to your home’s electrical grid to see if it can handle the designated load. It’s advisable to consult with a professional during this stage, ensuring adherence to local regulations. Document everything, from voltage readings to inverter performance, as this data helps with future troubleshooting and maintenance.
Monitoring and Maintenance Tips
After commissioning, monitoring your solar panels becomes crucial. Regularly check the monitoring system provided by your installer. Monitoring ensures real-time insights into energy production and system performance. Platforms typically offer apps or online dashboards for convenience. Begin by noting the daily and monthly energy outputs. These metrics help you understand if your system operates efficiently over time.
Maintenance ensures the solar panels deliver optimal performance throughout their lifespan. Regularly clean the panels to remove dirt and debris, which can obstruct sunlight. Do this every 6-12 months or after significant weather events. Inspect the panels and wiring visually for any physical damage.
Consider scheduling professional inspections annually. Technicians check for issues like loose wiring or degradation not easily visible. Keeping an eye on your system also involves staying updated with firmware updates for your inverter from the manufacturer. Up-to-date software can improve efficiency and even detect issues early.
Monitoring and maintaining your system elongates its life and performance. Embrace this solar lifestyle, making energy independence not only possible but sustainable.
For more detailed guidance and state-of-the-art solar solutions, visit Solar Panels for Life.
Troubleshooting
Even with a solid installation, you might encounter issues with your solar panels. Understanding these challenges helps in maintaining an efficient solar energy system.
Common Issues and Solutions
Solar panels may face several common issues affecting their performance. Let’s address some of them and their solutions.
- Reduced Energy Output: Sometimes, your solar panels generate less energy than expected. This can be due to dirt, debris, or shading on the panels’ surface. Solution: Clean the panels regularly and trim any overhanging branches obstructing sunlight. Another step is to check if any inverters or other components require firmware updates.
- Electrical Failures: Wiring problems or faulty connections can lead to system downtime. Solution: Inspect all connections and re-secure any loose wires. Use a multimeter to ensure all wiring connections meet expected voltage levels.
- Inverter Issues: The inverter is crucial in converting solar energy for home use. If the inverter displays error codes, this might indicate problems. Solution: Reset the inverter and consult the manual for troubleshooting error codes. If the issue persists, consider contacting the manufacturer for further guidance.
- Monitoring System Errors: Monitoring systems occasionally show inaccurate data or stop working. Solution: Reboot the monitoring device and check internet connectivity. If the problem remains, reconfigure the system settings via the user interface.
Being proactive with checking these common issues ensures the longevity of your solar energy system and optimizes performance.
When to Call a Professional
Not every solar panel issue warrants professional intervention, but certain instances do. When should you make that call?
- Complex Electrical Problems: If troubleshooting reveals persistent electrical issues that are beyond your expertise, it’s time to call a professional electrician. Solar panels involve high voltage; safety should be a priority.
- Roof Integrity Compromises: Noticed any leaks or structural damage after installation? The weight and installation method of solar panels could affect your roof. A roofing specialist can assess if additional support or repairs are necessary.
- Inverter Replacement: An inverter not working even though multiple resets might need replacing. A qualified technician ensures the new inverter integrates seamlessly with your existing system.
- Monitoring System Overhauls: Persistent errors or outdated firmware in monitoring systems might require a more thorough fix than a simple reset. Professionals can update firmware properly and troubleshoot deep system issues.
When facing these situations, it’s best to contact a certified solar provider. Expert intervention ensures your solar panels continue powering your home effectively and safely. For tailored advice, visit Solar Panels for Life and explore our expert guidance and product offerings.
Conclusion
Embracing solar energy for your Canadian home offers numerous benefits, from significant savings on electricity bills to a reduced carbon footprint. With government incentives and rebates, the initial investment becomes more manageable, making solar panels a viable and sustainable option. By following the comprehensive checklist provided, you can ensure a smooth transition to solar energy.
Assessing your home’s solar potential, understanding local regulations, and planning your budget are crucial steps. With the right preparation and professional guidance, you can optimize your solar installation for long-term efficiency and reliability. Start your journey toward energy independence and a greener future today.