Imagine harnessing the power of the sun right from your rooftop. With the increasing availability of government incentives and rebates, adopting solar energy has never been more accessible for Canadian homeowners. Did you know that switching to solar can significantly reduce your carbon footprint while also slashing your energy bills?
Why wait to make a positive impact on both the environment and your wallet? By taking the DIY route, you can transform your home into an eco-friendly powerhouse, enjoying long-term savings and energy independence. Intrigued by the possibilities? Let’s jump into a step-by-step guide to help you go from purchase to power with ease.
Understanding Solar Power for DIYers
Harnessing solar power opens up a world of benefits, starting with your electricity bills. Imagine generating your own electricity—sounds empowering, doesn’t it? You can enjoy this energy independence with a proper understanding of solar power and its components.
What is Solar Power?
Solar power converts sunlight into electricity using photovoltaic (PV) cells in solar panels. These cells capture sunlight and transform it into direct current (DC) electricity. An inverter then converts DC into alternating current (AC) used in homes. This process is efficient, eco-friendly, and has the potential to substantially reduce utility costs.
 10 mistakes canadians make in diy solar panel installation
Components of a Solar Power System
- Solar Panels: PV cells make up solar panels, capturing sunlight to generate electricity. For a typical Canadian home, a system size ranges from 4 kW to 10 kW, with the installation costs between CAD 12,000 to CAD 25,000.
- Inverter: Converts DC power from the panels into AC power for home use. Multiple inverter types exist, from string inverters to microinverters, each with unique benefits.
- Mounting System: Securely attaches the solar panels to your roof or ground installation. Proper mounting ensures durability and optimal sun exposure.
- Battery Storage (Optional): Stores excess energy for use when sunlight isn’t available. Battery storage adds cost but provides more energy autonomy.
Importance of Net Metering
Net metering measures the electricity you send back to the grid, offsetting your usage and reducing bills. This can be especially beneficial during peak sunlight hours when production is high. The extra electricity generated is not wasted and instead converts into credits, maximizing your solar investment.
Steps to Installing Your Solar Power System
- Site Assessment: Evaluate your property for solar potential. Ensure your roof has adequate sunlight exposure and is structurally sound for panel installation.
- Designing the System: Calculate your energy needs and design a system around them. Factor in how many kW your household uses and how many panels fit your space.
- Selecting Components: Choose high-quality panels and inverters. Research government incentives and rebates to help offset initial costs.
- Installation: Follow manufacturer guidelines and local building codes. If unsure, consider hiring a professional for complex tasks.
- Connecting to the Grid: Register with your utility provider and arrange for net metering. This setup lets you benefit from the solar energy generated.
Embracing the Solar Lifestyle
Switching to solar power isn’t just a technological upgrade; it’s a lifestyle choice. Adopting solar panels positions you as an environmentally-conscious homeowner contributing to sustainable living. Also, your property’s value can increase, making it a financially sound decision.
Ready to take the plunge? By understanding solar power’s fundamental components and following a step-by-step installation guide, you’ll be well on your way to achieving energy independence with Solar Panels for Life.
Materials and Tools Needed
Essential Materials
To begin on your solar DIY journey, certain materials become indispensable. The core of your setup comprises solar panels. Opt for high-efficiency models that can handle Canada’s varying weather conditions. At Solar Panels for Life, you’ll find units built to endure harsh winters and cloudy days.
Read also:10 mistakes canadians make in diy solar panel installation hidden costs of diy solar: what canadian homeowners must know
Inverters play a crucial role in converting the DC electricity generated by your panels into AC power for home use. Choose between string inverters, microinverters, or power optimizers based on your system size and shading conditions.
The mounting system ensures your panels remain securely in place. Roof mounts, ground mounts, and pole mounts all have their specific advantages. Analyze your space to decide the best option.
For those looking into energy storage, batteries are essential. Lithium-ion batteries offer longevity and efficiency, but assess your energy needs first.
Wiring and connectors help a safe and efficient connection. Opt for copper or aluminum wires with appropriate insulation. MC4 connectors prove to be reliable and compatible with most solar setups.
Read also:10 mistakes canadians make in diy solar panel installationhidden costs of diy solar: what canadian homeowners must know why your neighbor’s diy solar install failed: avoid this
Recap of Essential Materials:
- Solar Panels
- Inverters
- Mounting System
- Batteries (optional)
- Wiring and Connectors
Necessary Tools
Gather the right tools before starting your installation. Precise measurement ensures accurate alignment and safety.
A reliable drill comes first. Cordless models give flexibility, but ensure it’s powerful enough to handle your mounting system.
Screwdrivers and wrenches are next. Having a set of both Phillips and flat-head screwdrivers and an array of wrench sizes covers various fittings.
A multimeter helps measure electrical output and ensure connections are safe. Accuracy here means a safe, functioning system.
Read also:10 mistakes canadians make in diy solar panel installationhidden costs of diy solar: what canadian homeowners must knowwhy your neighbor’s diy solar install failed: avoid this how to save thousands on your solar setup: a canadian’s guide
Don’t forget safety gear: gloves and safety goggles prevent accidents during installation. Working with solar panels and electrical components requires caution.
Ladder and scaffolding might be necessary, especially for roof installations. Ensure your ladder is stable and the right height for your roof.
Finally, cable ties and clips assist in managing cables, keeping your setup clean and organized.
- Drill
- Screwdrivers and Wrenches
- Multimeter
- Safety Gear (gloves and goggles)
- Ladder and Scaffolding
- Cable Ties and Clips
Planning Your Solar Project
Creating a well-thought-out plan is key to a successful solar project. An effective plan will save time, reduce costs, and maximize the efficiency of your solar energy system.
Assessing Your Energy Needs
First, clearly identify your energy needs. Calculate your average monthly electricity consumption in kilowatt-hours (kWh). Check your utility bills to find this information. It’s vital because the size of your solar array will largely depend on your energy consumption patterns. For example, if your home uses 900 kWh per month, designing a system to meet or exceed this requirement is essential.
Consider seasonal variations in your energy use. Do you consume more in winter for heating or in summer for air conditioning? Knowing these patterns can help tailor your system to match your peak usage times. Also, think about future energy needs. Are you planning to add an electric vehicle or new appliances? If so, incorporate this into your calculations to ensure your solar panels provide sufficient power for years to come.
Choosing the Right Solar Panels
Selecting appropriate solar panels is crucial for the success of your DIY project. Understand the different types of solar panels available. Monocrystalline panels are known for their high efficiency and longer lifespan but come at a higher cost. Polycrystalline panels are less expensive but slightly less efficient. Thin-film panels offer flexibility and lower efficiency, suitable for areas with lots of space.
Check efficiency ratings and warranty periods. Higher efficiency panels generate more power in less space, a valuable feature if you have limited roof area. For instance, a panel with a 20% efficiency rating produces more electricity than one with a 15% rating. Brands offering longer warranties often build more durable and reliable panels. At Solar Panels for Life, we recommend considering both the upfront cost and the long-term value.
Investigate the panel’s temperature coefficient. This metric indicates how well a panel performs in high temperatures. Panels with lower temperature coefficients perform better under the intense sun, crucial for maintaining efficiency during hot summer months.
Ready to dive deeper? Explore our wide range of options and find the best fit for your solar lifestyle.
Purchasing Your Solar Equipment
Taking the plunge into the solar lifestyle starts with purchasing the right solar equipment. This decision impacts not only your initial costs but also long-term performance and savings.
Where to Buy in Canada
Finding reputable solar panel suppliers is crucial for Canadian homeowners embarking on a solar journey. Major retailers like Solar Panels for Life offer a range of products tailored to diverse energy needs. You could also explore specialized solar shops that focus solely on solar equipment, ensuring a broad selection and knowledgeable staff.
Online vs. Local Retailers: Online retailers often provide the advantage of competitive prices and detailed specifications. But, local retailers provide the benefit of in-person consultations and immediate support, making them an excellent choice for first-time buyers.
Community and Trade Shows: Consider attending local trade shows or community events focused on renewable energy. These venues often introduce you to various vendors and allow you to compare equipment in person.
Comparing Prices and Warranties
Balancing cost and quality is vital when selecting solar panels. At Solar Panels for Life, we emphasize the importance of considering both the price tag and the warranty offered.
Price Factors: Higher efficiency solar panels generally come at a premium but pay off in the long run. While it’s tempting to go for the cheapest options, consider the overall value. Do you want budget panels with lower efficiency or slightly pricier panels offering better performance?
Warranty Considerations: Warranties protect your investment. Typical warranties on solar panels range from 10 to 25 years. A longer warranty period often indicates better quality and reliability, giving you peace of mind for two decades or more.
Performance Guarantees: Look for performance guarantees that promise a certain efficiency level over the years. This ensures your panels retain their productivity, maintaining your energy independence.
Do some comparison shopping. Checking multiple sources helps you strike the perfect balance between price and durability, ensuring you get the most bang for your buck in your solar adventure. Need more guidance? Solar Panels for Life is here to assist. Explore your options today and step confidently into your solar lifestyle.
Designing the Solar System
Calculating Solar Panel Requirements
Determining the number of solar panels needed (e.g., monocrystalline, polycrystalline) for your home involves more than just surface area. Begin by calculating your average daily energy consumption in kilowatt-hours (kWh), based on past utility bills. Consider seasonal variations; for instance, winter months may differ significantly.
Next, factor in the peak sunlight hours for your location. Canada’s average is 3.5 to 5.5 hours daily, depending on the region. Use this to estimate how much energy a single solar panel can produce daily. Multiply the panel’s wattage by peak sunlight hours and then divide your daily energy consumption by this figure. This provides the number of panels required.
Wouldn’t it be frustrating to invest in fewer panels and fall short of your energy goals? Avoid this by adding a 25-30% buffer to your calculations, accounting for efficiency losses and future energy requirements. This ensures you meet your goals, maintaining your solar lifestyle while embracing energy independence.
Designing the Mounting System
A well-designed mounting system ensures solar panels remain secure and oriented correctly. Start by choosing the mounting location, either rooftop or ground-based. Rooftop systems are space-efficient, yet ground-based setups offer easier maintenance.
Evaluate the structural integrity of your mounting location. Roofs must handle the additional weight, while ground-based mounts need stable, level terrain. Consider also the angle of tilt, both based on your geographical latitude and seasonal sun angles. This optimization maximizes efficiency.
Wondering how to deal with harsh weather conditions? Select mounts made from durable materials like galvanized steel or aluminum. Incorporating wind and snow load considerations, particularly for Canadian climates, ensures your system’s longevity. This meticulous planning safeguards your investment and promotes a sustainable solar lifestyle.
Planning the Electrical Layout
Planning the electrical layout involves strategic placement of inverters, batteries, and wiring. Identify the optimal location for your inverter, close to the main panel but in a ventilated area, preventing overheating. Batteries, if used, should be in a temperature-controlled space to extend their life.
Determine the cable routes to reduce distance and energy loss. Prioritize safety by ensuring wires are properly insulated and use conduits where exposure to elements might occur. Install shut-off switches at necessary points, simplifying maintenance and emergency procedures.
Considering how to seamlessly integrate this with your existing electrical system? Engage a licensed electrician to verify your layout, especially when connecting to the grid. This step cement’s your project’s success, safely transitioning your home into the area of solar energy while enjoying the benefits of your solar panels for life.
Installation Process
Preparing the Installation Site
Before starting the installation, assess the installation site thoroughly. Identify any potential obstructions that could block sunlight, such as trees or nearby buildings. Ensure the roof or ground area is structurally sound and capable of supporting the solar panels.
Next, clean the site. Remove any debris or dirt that might hinder the installation process. Safety is paramount, so wear appropriate safety gear, including gloves and non-slip shoes. It’s crucial to verify you meet local zoning regulations and building codes to avoid future issues.
Once the site is prepped, mark the locations for mounting the solar panels. Use a measuring tape and chalk line to ensure accurate placement. If conditions change, such as new construction nearby, periodically reassess the site to maintain optimal efficiency for your solar system.
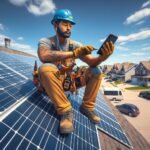
Mounting the Solar Panels
Mounting the solar panels involves attaching the mounting system to your roof or ground setup. Use weather-resistant materials for the mounting system to ensure longevity and resilience against Canadian weather conditions. Start by installing the mounting brackets. Ensure these brackets are firmly attached, as they form the foundation for your solar panels.
Once brackets are in place, attach the rails to the brackets. Align these rails accurately to help easy panel installation. Double-check the alignment to prevent issues later. Install the panels by securing them onto the mounting system using provided clamps and hardware.
Balancing aesthetics and functionality is key; aim to position the panels for maximum sun exposure while maintaining a neat appearance. If inclined toward a solar lifestyle, remember this setup is an investment in your home’s energy efficiency.
Wiring the System
Proper wiring ensures your solar system operates safely and efficiently. Connect the solar panels using appropriate wiring codes. It’s vital to follow the manufacturer’s instructions for wiring details. Use quality connectors to secure the connections, reducing the risk of electrical faults.
Connect the series of panels to the inverter, which converts the DC electricity generated by the panels into AC electricity for home use. Ensure all connections are tight and weatherproof. Route the wiring neatly to avoid tangling and help maintenance.
Finally, connect the inverter to the main power supply. This step often necessitates the expertise of a licensed electrician. A professional’s input ensures compliance with electrical codes and guarantees safety. Once the wiring is complete, test the system to confirm it operates as expected.
Ready to power your home with solar panels? Begin your journey with Solar Panels for Life and explore a sustainable energy future.
Connecting to the Grid
Connecting your solar power system to the grid is a crucial step for maximizing efficiency and gaining the most from your solar investment. This process allows excess energy from your solar panels to feed into the utility grid and ensures you have a consistent power supply even when sunlight is insufficient.
First, contact your utility provider to understand the specific requirements and regulations for grid connection in your area. Canada has varying rules and permits based on the province. Your utility company provides essential guidance on required documentation and procedural steps.
Next, install a bi-directional meter. This smart device tracks both the electricity you consume and the surplus energy your solar panels generate and send back to the grid. This setup, known as net metering, offsets your energy bills efficiently, making your solar lifestyle financially rewarding.
Ensure you have the correct inverters. A grid-tied inverter synchronizes with your local grid’s frequency and converts the DC electricity produced by your solar panels into AC electricity usable by your home and transmittable to the grid. Choosing high-quality, durable inverters from reputable manufacturers is vital.
Then, run the necessary wiring. This task demands precision and adherence to local electrical codes. A licensed electrician must complete this step to ensure safety and regulatory compliance. Proper wiring avoids potential hazards and guarantees your system operates seamlessly with the grid.
Wondering about safety? Invest in safety gear and install safety disconnects. These switches allow you to safely disconnect your solar power system from the grid for maintenance or during emergencies, ensuring the protection of your home and equipment.
Finally, perform thorough testing. Once everything is connected, test the entire system with the help of a licensed electrician. A comprehensive check validates the system’s functionality and compatibility with grid standards, ensuring efficient and reliable operation.
Ready to enhance your energy independence? Explore our range of high-efficiency solar panels and accessories at Solar Panels for Life, and begin on your journey towards a sustainable future today.
Testing and Commissioning
Testing and commissioning form the final steps in your DIY solar journey. This stage ensures that the solar power system operates safely and efficiently.
Conducting Initial Tests
Testing begins with preliminary checks to verify proper installation. Inspect the solar panels visually, ensuring no cracks or debris. Check all wiring connections, confirming that they are tight and secure. Then, use a multimeter to measure the voltage output from each panel and ensure it matches the expected values. These steps confirm that the panels receive and transmit sunlight energy effectively.
Monitoring System Performance
After initial tests, focus on system performance monitoring. You can use monitoring software or apps to track the energy production of your solar panels. Regularly review these readings to ensure your system works optimally. Check for any significant performance drops, which could indicate shading issues or equipment faults. This proactive monitoring keeps your solar lifestyle efficient and productive.
Interested in reliable solar solutions? Explore your options at Solar Panels for Life.
Tips and Warnings
Transitioning to solar energy offers numerous benefits, but careful planning and attention to details are crucial. Here are some tips and warnings to ensure a safe and successful DIY solar installation.
Safety Precautions
Prioritize Electrical Safety: Handling electrical components? Always turn off the main power supply before starting any installation. Use insulated tools and wear rubber-soled shoes to reduce shock risk.
Use Proper Gear: Safety gear is non-negotiable. Equip yourself with gloves, safety goggles, and a hard hat. Climbing onto roofs? Ensure you use a sturdy harness to prevent falls.
Check Weather Conditions: Conduct installations on clear, calm days. Windy or wet conditions? Postpone the work to avoid accidents.
Inspect Work Area: Before installing solar panels, clear all obstructions from your roof. Look for loose shingles or damaged areas and repair them to ensure a stable base.
Consult Professionals: Electricians must handle grid connections. DIY installations involve complex wiring and regulations that require licensed expertise for safety and compliance.
Thoroughly Read Manuals: Adhere strictly to manufacturer instructions for each component. Manuals provide specific installation steps, ensuring components function correctly and safely.
Common Mistakes to Avoid
Ignoring Permits and Regulations: Failing to comply with local regulations may result in fines or having to redo work. Check with local authorities to secure necessary permits and understand building codes.
Underestimating Energy Needs: Install enough solar panels to meet your energy consumption. Calculate average usage and plan for potential increases, ensuring your system has sufficient capacity.
Incorrect Panel Placement: Position solar panels to maximize sun exposure. South-facing roofs are ideal in Canada, offering optimal energy capture throughout the year.
Overlooking Wiring Best Practices: Use properly rated wires and secure connections. Loose or undersized wiring can lead to power loss and potential fire hazards.
Skipping System Testing: Before connecting to the grid, perform rigorous tests. Use a multimeter to verify voltage output and check all connections for stability.
Neglecting Maintenance: Regularly clean and inspect solar panels for performance efficiency. Dust and debris can significantly reduce panel efficiency, decreasing energy production.
Avoid these pitfalls and harness the full potential of your solar installation. At Solar Panels for Life, we’re here to support your journey to a sustainable, energy-independent lifestyle. Curious to learn more? Explore our range of high-quality solar panels designed for long-term performance.
Troubleshooting Common Issues
Even with careful planning and installation, solar panel systems can encounter problems. Keep your system running smoothly by identifying and resolving common issues promptly.
Solar Panel Not Producing Power
If your solar panels are not generating power, start by checking the obvious. Are the panels clean? Dust and dirt can significantly reduce efficiency. Use a soft brush or a low-pressure hose to clean them.
Next, inspect the panel connections. Loose or corroded connectors could disrupt the power flow. Ensure all connections are secure and free from corrosion.
Check the inverter display for error codes. If codes appear, refer to the manufacturer’s manual for specific troubleshooting steps.
Finally, have a look at the wiring. Damaged or frayed wires can lead to power loss. Replace any compromised wiring and recheck the system.
Inverter Malfunctions
An inverter converts the DC electricity generated by solar panels into AC electricity used by household appliances. If this critical component fails, your system won’t function.
Start by checking the inverter display for error messages or lights indicating a fault. Refer to the manual for specific error codes and messages.
Inspect the inverter’s physical condition. Look out for signs of damage like burns or broken parts. Sometimes, overheating can cause malfunctions, so ensure the inverter has adequate ventilation.
If the problem persists, performing a simple reset could resolve minor issues. Turn off the inverter, wait a few minutes, then turn it back on. If none of these steps work, it may be time to consult a professional.
Poor System Performance
Feeling that your solar system isn’t living up to its potential? Let’s troubleshoot.
First, examine shading issues. Even a small shadow on a part of the solar panel can reduce the overall efficiency dramatically. Trim overhanging branches or relocate any obstructions.
Next, check the orientation and tilt of your panels. Their angle and direction should maximize exposure to sunlight. Adjust as needed based on seasonal changes and your geographical location.
Review your energy monitoring system. This tool helps track the energy produced and consumed. Comparing performance data to expected outputs can highlight inefficiencies.
If these efforts don’t resolve the issue, professional maintenance could help optimize your system for better performance.
By addressing these common issues, you can ensure your solar panels continue to provide sustainable energy efficiently. For more detailed guidance, visit Solar Panels for Life, where a solar lifestyle awaits.
Conclusion
Embarking on a DIY solar installation journey in Canada can be both rewarding and empowering. With the right planning and tools, you can achieve energy independence, reduce your carbon footprint, and enjoy significant savings on your energy bills. By following the comprehensive steps outlined in this guide, you’ll be well-equipped to navigate the complexities of solar power installation.
Remember to prioritize safety and consult professionals when necessary to ensure a successful and compliant setup. Your commitment to sustainable living not only benefits you but also contributes to a greener future for all.